Flutter Guide: app programming for iphone - Quick Start
Flutter Guide: app programming for iphone - Quick Start
When you're diving into app programming for iPhone, the technology you choose is everything. It needs to deliver on performance, speed, and create an experience that users love. For UK businesses and developers, Flutter has quickly become the framework of choice, and for good reason. It gives you the power to build slick, natively compiled apps for iOS—all from one single codebase.
Why Flutter Is Your Best Bet for iPhone Apps in the UK

Let's be honest, when it comes to iPhone apps, performance is completely non-negotiable. Users have zero patience for laggy animations or slow responses, and this is where Flutter truly shines.
Unlike other cross-platform frameworks that often use a JavaScript bridge to communicate with native components, Flutter cuts out the middleman. It compiles your Dart code directly into native ARM machine code. This simple but profound difference means there’s no performance bottleneck, resulting in those buttery-smooth interfaces that hit a consistent 60 frames per second. For UK businesses trying to impress a savvy audience, this native-like performance is a massive competitive edge.
Build Stunning, Bespoke UIs with Ease
Flutter isn’t just fast; it’s also incredibly flexible. Its entire architecture is built around a massive library of customisable widgets. This approach lets developers create genuinely bespoke user interfaces that perfectly capture a brand's unique identity, rather than being stuck with standard, generic iOS components. You get control over every single pixel on the screen.
This level of creative freedom is vital if you want to stand out in an app store packed with competitors. Whether you’re a startup in London trying to make a splash or an established brand in Manchester reinforcing your image, Flutter gives you the tools to design captivating app experiences that keep users coming back. You’re not just building another app; you're crafting a digital experience.
"The ability to build expressive and flexible UIs is one of Flutter's superpowers. It frees developers from the rigid constraints of traditional UI toolkits, enabling faster creation of pixel-perfect experiences that delight users on any device."
Get to Market Faster
In the UK’s fast-moving digital market, speed is everything. Flutter’s killer feature here is Hot Reload. It allows developers to see the results of their code changes in the app almost instantly—we’re talking under a second. This makes experimenting, tweaking the UI, and fixing bugs incredibly efficient and dramatically shortens development cycles.
This rapid feedback loop means bugs get squashed faster, new features are rolled out quicker, and your minimum viable product (MVP) can hit the market much sooner. Recent benchmarks consistently place Flutter at the top for performance, a key factor that we explore in our detailed framework comparisons. This efficiency truly sets Flutter apart. You can read more about how it stacks up in our guide to Flutter vs React Native.
Make no mistake, the UK's mobile app market is a huge and valuable space. With projections showing it will blow past £15 billion by 2025, the opportunity for growth is massive. Crucially, iOS apps are the dominant force here, expected to account for an estimated 69.36% of mobile app revenue in the UK for 2024. This just underlines how important it is to pick a solid, efficient framework for your iPhone app projects. You can dive deeper into these trends by checking out the full research on the UK's mobile application market.
Configuring Your Mac for Flutter iOS Development
Before you can bring your app idea to life, you need a solid foundation. Getting your development environment set up correctly is the essential first step in app programming for iPhone with Flutter. It might seem a bit daunting at first, but with a bit of guidance, you’ll have a professional, efficient workspace ready to go.
This isn’t just about downloading a few bits of software; it’s about configuring your Mac to create a smooth workflow, helping you sidestep the common frustrations that often trip up new developers. We'll walk through the must-have tools, from the Flutter SDK itself to a proper code editor and Apple’s own powerhouse, Xcode.
Before we dive in, here’s a quick look at the essential software you'll need to get everything up and running. Think of this as your setup checklist.
Essential Tools for Flutter iOS Development
| Tool | Purpose | Where to Get It |
|---|---|---|
| Flutter SDK | The core framework and command-line tools for building your application. | Official Flutter website |
| Xcode | Apple's IDE, providing the iOS simulator, compilers, and build tools. | Mac App Store |
| Visual Studio Code | A lightweight and powerful code editor for writing Dart and Flutter code. | Official VS Code website |
| Flutter & Dart Extensions | VS Code plugins that add language support, debugging, and Hot Reload. | VS Code Marketplace |
| CocoaPods | The dependency manager for native iOS components used by Flutter plugins. | Installed via RubyGems |
With that overview, let's get into the specifics of installing and configuring each one.
Installing the Flutter SDK and Xcode
First things first, you need the core components. The Flutter Software Development Kit (SDK) is the engine of your whole operation, containing all the tools, libraries, and runtimes needed to build your app. The installation itself is pretty straightforward, but the most important part is adding it to your system's PATH.
Getting your PATH variable right lets you run Flutter commands from any terminal window, which is a massive time-saver. A pro tip is to edit your shell's configuration file (like .zshrc or .bash_profile) to permanently add the Flutter bin directory. It’s a one-time change that saves you from typing out the full path every single time.
You'll also need to install Xcode from the Mac App Store. There's no getting around this one—Xcode is Apple's integrated development environment (IDE) and is absolutely essential for any iOS development. It provides the iOS simulator, compilers, and all the behind-the-scenes build tools that Flutter hooks into. Once it's installed, make sure you open it at least once to agree to the licence terms and let it finish installing its command-line tools.
Setting Up Your Code Editor
You could write code in a basic text editor, but trust me, using a modern editor with proper support for Flutter and Dart will make your life infinitely easier. Visual Studio Code (VS Code) is the go-to choice in the Flutter community, and for good reason. It’s lightweight, incredibly fast, and has a huge library of extensions.
To get VS Code working like a dream for Flutter, you'll want to install two key extensions from the VS Code Marketplace:
- Flutter: This extension gives you the full experience, from creating projects and debugging to running your app directly from the editor.
- Dart: This provides all the language support you need, like syntax highlighting, intelligent code completion, and real-time error analysis for the Dart programming language.
These two extensions transform VS Code from a simple editor into a powerful hub for Flutter development, integrating so well with the SDK that features like Hot Reload feel like magic.
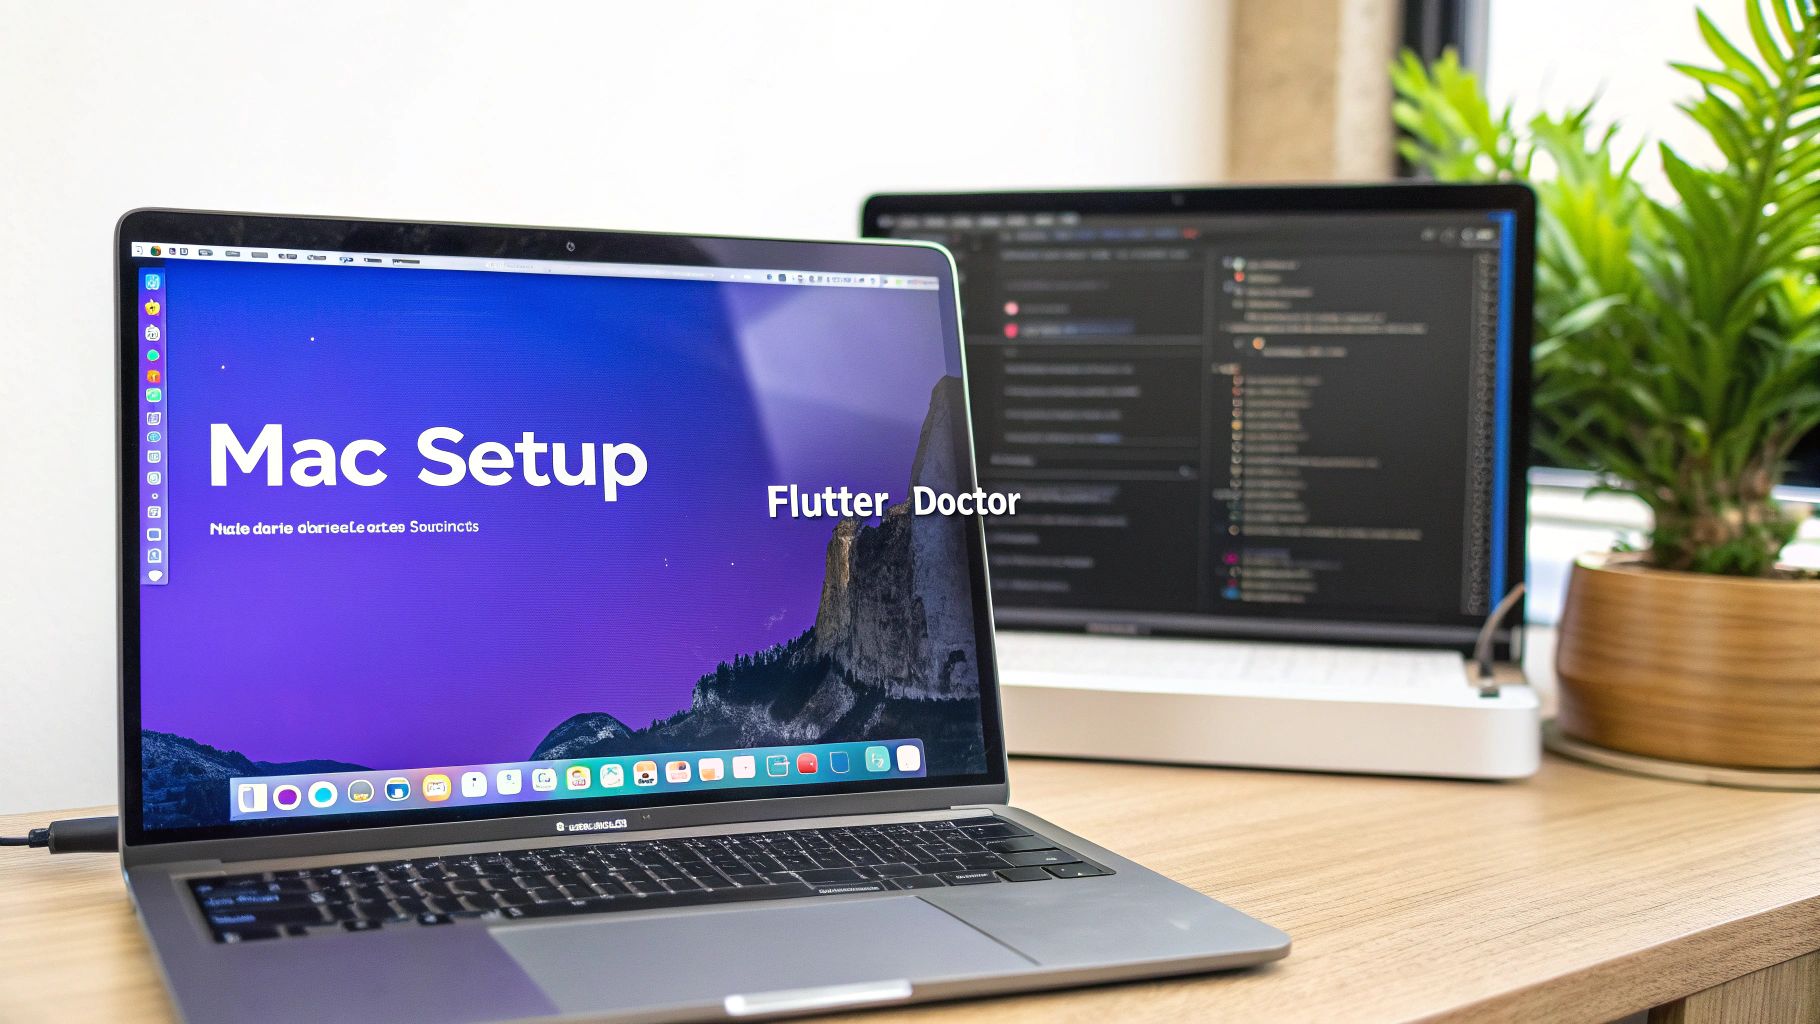
My best piece of advice during setup? Make
flutter doctoryour best friend. Running this command in your terminal diagnoses your entire environment. It checks your Flutter installation, any connected devices, and other dependencies, and if it finds any issues, it gives you clear instructions on how to fix them.
Managing iOS Dependencies with CocoaPods
As you build for iOS, you'll eventually come across CocoaPods. It's the dependency manager for Swift and Objective-C projects, and Flutter uses it under the hood to manage any native iOS plugins your app might need. Most of the time, this all happens automatically, but it’s helpful to know what it is and why it's there.
If flutter doctor ever flags an issue with CocoaPods, you can usually fix it by running sudo gem install cocoapods in your terminal. Keeping CocoaPods up to date is a good habit, as it helps prevent strange compatibility problems when you add new packages that rely on native iOS features. A clean CocoaPods setup is your ticket to avoiding those mysterious Xcode build errors.
With these components in place—the Flutter SDK, Xcode, a fully configured VS Code, and CocoaPods—your Mac is now a powerhouse ready for professional app programming for iPhone. You’ve built a rock-solid foundation for an efficient and frustration-free coding experience.
Building Your First iPhone UI with Flutter Widgets
Alright, with the development environment set up and ready to go, it’s time for the fun part: bringing your user interface to life. This is where your app idea starts to feel real. We’re going to move past the theory and build a practical UI for a sample UK-based app—a local coffee shop finder.
In Flutter, literally everything you see on the screen is a widget. Think of them as Lego bricks. You snap together simple widgets like text and icons to build more complex ones like buttons and cards, which then form your complete screens. This widget-first approach is exactly what makes building beautiful, high-performance UIs so intuitive.
Understanding Stateless vs. Stateful Widgets
Before we start laying out our first screen, there’s a crucial concept you need to get your head around: the two fundamental types of widgets in Flutter. Nailing this distinction is key to managing how your app looks and behaves.
- StatelessWidget: This is your simple, “what you see is what you get” widget. Once it’s built, it doesn’t change. A
Textlabel, anIcon, or a simple button with a fixed colour are all perfect examples. They’re incredibly efficient and ideal for any static part of your UI. - StatefulWidget: This is a dynamic widget that can change its appearance based on user interaction or new data. If you have a checkbox that can be ticked, a favourites button that toggles on and off, or a text field a user types into, you absolutely need a
StatefulWidgetto rebuild the UI and show those changes.
For our coffee shop finder app, the list of shops could start as a StatelessWidget. But the moment you want a user to tap a "favourite" icon next to a shop, that specific part would need to be Stateful to redraw itself when its state changes.
Building the Main App Structure
Every decent iPhone app needs a solid foundation. In Flutter, the Scaffold widget provides exactly that. It gives you the standard visual layout structure of a mobile app, complete with an app bar at the top and a main body area for your content.
Let's put together a basic screen structure for our coffee shop finder.
import 'package:flutter/material.dart';
void main() => runApp(const CoffeeShopApp());
class CoffeeShopApp extends StatelessWidget {
const CoffeeShopApp({super.key});
@override
Widget build(BuildContext context) {
return MaterialApp(
title: 'UK Coffee Finder',
home: Scaffold(
appBar: AppBar(
title: const Text('London Coffee Shops'),
),
body: const Center(
child: Text('Welcome to the best coffee in town!'),
),
),
);
}
}
This short snippet actually gives us a fully functional, if a bit plain, iPhone app screen. The Scaffold handles the top navigation bar (AppBar) and provides a body where everything else will live. It’s a clean and reliable starting point.
Laying Out Content with Rows and Columns
Now, let's get rid of that simple "Welcome" text and create a more structured layout. Most UIs can be broken down into horizontal (Row) and vertical (Column) arrangements. These are your go-to tools for organising content.
Imagine we want to display a single entry for a coffee shop. It might have an image on the left and some text details on the right. We can pull this off by nesting widgets inside a Row.
Row(
children: <Widget>[
Image.asset('assets/coffee_shop.png', width: 100), // Placeholder image
const SizedBox(width: 16), // A bit of spacing
Column(
crossAxisAlignment: CrossAxisAlignment.start,
children: const <Widget>[
Text('The Grindhouse', style: TextStyle(fontSize: 18, fontWeight: FontWeight.bold)),
Text('Shoreditch, London'),
],
),
],
)
See what we did there? We used a Row to place the image and text side-by-side. Then, inside that Row, we used a Column to stack the coffee shop's name and location vertically. This simple combination is incredibly powerful and forms the basis of most layouts you'll ever build. For a complete application, our expert Flutter development services focus on crafting these intricate yet efficient UI structures.
Creating a Scrollable List of Items
Our app will need to show more than one coffee shop, obviously. To display a long list of items that won’t fit on the screen, we need a ListView. This widget makes its content scrollable by default, which is absolutely essential for a good user experience on a compact iPhone screen.
For this, we can use ListView.builder, which is highly optimised for performance. It only builds the items that are currently visible, ensuring your app stays smooth even with thousands of entries.
Here’s a quick rundown of how you’d build that list of coffee shops:
- First, define a simple data model (a class) to hold the info for each coffee shop.
- Next, create a list and fill it with several instances of your coffee shop model.
- Finally, use
ListView.builder. You’ll tell it how many items are in your list (itemCount) and give it a function (itemBuilder) that explains how to build the widget for each individual item.
Here's a key takeaway: responsive design is non-negotiable. Using widgets like
ListView,Expanded, andFlexibleensures your UI adapts gracefully to different iPhone screen sizes, from the SE to the Pro Max. A static layout will inevitably look broken on some devices, so always build with flexibility in mind.
Putting the time into a well-structured and beautifully designed UI is critical; it directly impacts user engagement and retention. While the coding is a huge part of the process, the financial side is just as important. The cost of developing an iPhone app in the UK can range from approximately £11,000 to £125,664 in 2025, depending heavily on its complexity. You can discover more insights about iOS app development costs in the UK to get a better handle on project budgeting. This significant investment is exactly why choosing an efficient framework like Flutter is such a smart business decision.
Making Your Flutter App Interactive
A beautiful user interface is a fantastic start, but the real magic happens when your app actually does something in response to the user. This is where your journey into app programming for iPhone gets really interesting, as we turn a static display into a living, breathing experience. We'll be diving into how to manage what your app remembers and how it reacts—a concept known as state management.
At its core, "state" is just any piece of data that can change over time. It could be the text a user is typing into a search bar, whether a toggle is switched on or off, or the currently selected item in a list. Flutter has a really straightforward way of handling these changes right out of the box.
The Basics of State with setState
Let's start with a classic scenario in our coffee shop app: a "favourite" button. When someone taps an icon to mark a coffee shop as a favourite, the icon needs to change, maybe from an empty heart to a filled one. That instant visual feedback is crucial, and setState is the perfect tool for the job.
To get this working, the widget holding the heart icon needs to be a StatefulWidget. When the user taps the icon, you call the setState function. Inside that function, you simply update the variable that's tracking the favourite status (like a boolean called isFavourited). Calling setState is like telling the Flutter framework, "Hey, some data just changed, so please rebuild this widget to show the latest state." Flutter then redraws the widget, and the user sees the updated icon immediately.
This method is incredibly effective for managing state that is completely contained within a single widget. It’s simple, direct, and ideal for localised UI changes like toggles, sliders, or simple button states.
For simple, localised state changes,
setStateis your best friend. It’s lightweight, built-in, and forces you to think about which specific parts of your UI need to be dynamic. Mastering this is the first essential step towards creating truly interactive apps.
Handling User Input with Forms
As your app gets more complex, you'll need to handle more than just a simple tap. A very common task is collecting user data through forms, like for a contact page or a user profile screen. This involves managing the state of several input fields and giving the user real-time feedback.
Let's imagine we're building a functional contact form. We’ll need a few TextFormField widgets for the user's name, email, and message. To manage the form's state and validation, we wrap these fields in a Form widget and link them up with a GlobalKey.
This key is what lets us interact with the form's state, especially for validation. Each TextFormField can have a validator property, which is a function that checks the input. You could write a simple validator to make sure the name field isn't empty, or that the email field actually contains an "@" symbol. When the user hits "submit", you can call _formKey.currentState!.validate() to run all the validators and pop up helpful error messages right where they're needed.
This kind of immediate feedback is a cornerstone of good user experience, gently guiding the user to fix their mistakes without getting frustrated. Capturing the final data is just as easy; once the form is valid, you can call the onSaved method for each field to process the user's input.
Knowing When to Level Up Your State Management
While setState is brilliant for simple cases, it has its limits. Picture trying to share the "favourite" status of a coffee shop across multiple screens. Using setState would mean passing data up and down the widget tree, a process that gets messy and difficult to maintain really fast. This is exactly when more advanced state management solutions step in.
As your app grows, keep an eye out for these signs that it’s time for a more powerful approach:
- Shared State: When different, unrelated widgets all need to access or change the same piece of data.
- Complex Business Logic: If your app's logic becomes too complicated to cram inside a
StatefulWidget'sbuildmethod. - Separation of Concerns: When you want a clean split between your UI code and your business logic, which makes your app far easier to test and understand.
For these situations, the Flutter community has created fantastic solutions like Provider and BLoC (Business Logic Component). Provider is a great next step, offering a simple way to make state available to any widget that needs it, without all the manual data passing. BLoC is a more structured pattern that uses streams to manage the flow of data, making it perfect for complex apps with lots of user interactions and data sources.
Navigating Between Screens and Passing Data
Finally, a truly interactive app rarely stays on a single screen. Navigation is the backbone of the user's journey, letting them move from a list of coffee shops to a detailed view of just one. Flutter’s Navigator makes this whole process feel natural.
To move to a new screen, you "push" a new route onto the navigation stack. For example, when a user taps on a coffee shop in your ListView, you'd call Navigator.push(). The crucial part is that you can pass data along with it. When you create your detail screen widget, you can define its constructor to accept a CoffeeShop object.
This way, the detail screen gets all the information it needs to display the specific shop the user selected—its name, address, photos, and so on. This pattern of pushing new screens and passing data is a fundamental skill in app programming for iPhone and is essential for building any multi-screen app. It keeps your code organised and ensures a seamless flow for the user.
From Testing to App Store Submission
You've built the logic and designed a beautiful UI, which are huge milestones when programming an iPhone app. But the journey isn't quite over. The final stretch—testing, preparing, and submitting your app—is what separates a good app from a great one. This is the phase where you ensure your application is robust, bug-free, and truly ready for its debut on the App Store.
Flutter comes with a powerful, multi-layered testing suite that helps you catch issues early on. This isn't just about tapping around to see if the app crashes; it’s a systematic approach to guaranteeing quality, from the smallest function right up to the complete user journey. Embracing these testing practices is non-negotiable for a smooth launch.
The infographic below gives a nice overview of how a Flutter app becomes responsive to user interaction, which is a key area you'll be testing rigorously.

This flow really highlights how managing state, handling input, and enabling navigation all have to work together perfectly. Making sure they do is what validation and testing are all about.
Mastering Flutter's Testing Pyramid
Flutter encourages a solid testing strategy that’s broken down into three main categories. Each type of test has a distinct purpose, and when you use them together, they form a powerful safety net for your codebase.
- Unit Tests: These are your foundation. A unit test verifies a single function, method, or class in complete isolation. You might write one to confirm a date formatting function handles various inputs correctly, all without needing to render any UI. They're fast, simple, and your first line of defence against logic errors.
- Widget Tests: This is where Flutter really shines. A widget test checks that an individual UI component looks and behaves exactly as you expect. You can simulate user interactions like tapping a button or entering text, then verify that the widget's state updates and the UI redraws correctly. It’s incredibly powerful.
- Integration Tests: These tests cover the entire app or at least a large part of it. They run on a real device or simulator, automating user journeys from start to finish—think logging in, finding a product, and adding it to the cart. They are slower to run, but they're invaluable for catching those tricky issues that only pop up when different parts of your app interact.
The real value of testing isn't just about finding bugs; it's about building confidence. A solid test suite means you can add new features or refactor code without that constant fear of breaking something unexpectedly. It’s a direct investment in your app's long-term health and stability.
For any project that's more than a simple hobby app, integrating these tests into an automated pipeline is a game-changer.
Preparing Your Build with Xcode
Once your app is thoroughly tested and polished, it’s time to get it ready for submission. This means stepping out of your familiar development environment and into Apple's ecosystem using Xcode. Although Flutter does most of the heavy lifting, a few final configuration steps are always needed.
First, you'll open your project's ios folder in Xcode. This is where you set crucial details like the Bundle Identifier—your app's unique ID on the App Store—and configure things like app icons and launch screens. Xcode is also where you'll manage your code signing certificates and provisioning profiles, which are Apple's way of making sure only authorised developers can release apps.
Finally, you’ll generate a signed release build. This process compiles all your Dart code and assets into a native iOS package (an .ipa file) that’s optimised for performance and ready for distribution.
Navigating App Store Connect
With your build file in hand, the final stop is App Store Connect, Apple's web portal for managing everything about your app's presence. This is where you’ll create your product page, which is your one shot to make a compelling first impression on potential users.
Your app listing will need several key elements to be complete:
- Screenshots and App Previews: High-quality visuals are a must. They need to showcase your app's main features and look professional.
- Promotional Text and Description: This is your sales pitch. Write a concise and persuasive description explaining what your app does and why users should download it.
- Keywords: Think about what terms people would use to find an app like yours. Good keywords are crucial for discovery.
When targeting the UK market, it’s worth remembering how engaged the local user base is. While Android holds a narrow 50.1% market share, iOS is right on its heels at 49.3% of UK smartphone users as of 2025. What's crucial is that iOS apps tend to show much better retention, a key factor for monetisation.
After you’ve uploaded your build and filled out all the metadata, you'll submit your app for review. Apple's team will check it for compliance with their App Store Review Guidelines. This process can take a few days, but with careful preparation, you’ll be well on your way to a successful launch.
Got Questions About Flutter for iPhone Apps?
It's only natural to have a few questions when you're looking at a powerful framework like Flutter for your next project. We talk to a lot of UK businesses, and most of them want to know the real-world practicalities of app programming for iPhone with Flutter, especially when weighing it up against native development.
Let's dive into some of the most common queries we hear.
One of the first things people ask is whether a Flutter app can genuinely match the performance of one built natively in Swift. The answer is a resounding yes. Flutter's architecture is a different beast entirely compared to other cross-platform options. It doesn't rely on a web view or an interpretation bridge; it compiles your Dart code directly into native ARM machine code.
This means you get blistering performance and a buttery-smooth 60fps user experience that is, for all intents and purposes, indistinguishable from a native app. When you combine that with a single codebase for both iOS and Android, it's easy to see why it's a more efficient and cost-effective choice for most UK companies than building and maintaining two separate apps.
How Does Flutter Handle UK-Specific and Native iOS Features?
Another big question we get is about handling UK-specific compliance and accessing the iPhone's hardware. For example, how does a Flutter app handle something as crucial as GDPR?
It's actually quite straightforward. You build the compliance logic right into your Dart code, just as you would in a native app. This means creating clear consent flows for data collection and using battle-tested packages like flutter_secure_storage to keep sensitive user information locked down. Since the logic is part of your shared codebase, you build it once, and it works everywhere.
But what about the really 'native' stuff, like Face ID or the camera?
This is where Flutter's incredible ecosystem of plugins comes into play. The community has built thousands of packages, available on pub.dev, that act as a bridge to the native iOS APIs. This gives you full-fat access to all the device capabilities you need, without ever having to write a line of Swift or Objective-C.
Here are just a few examples of how easily you can tap into native iPhone features:
- Biometric Logins: Want to secure your app with Face ID or Touch ID? The
local_authpackage makes it simple. - Camera Access: Need full control over the iPhone's camera for taking photos or recording video? The
camerapackage has you covered. - Location Services: To build features based on a user's location, the
geolocatorpackage gives you direct access to the device's GPS.
This robust plugin system means you never have to make compromises. You can build a feature-rich, high-performance iPhone app that feels completely native, all while reaping the time and cost-saving benefits of Flutter.
Ready to build a high-performance, beautiful iPhone app with Flutter? The expert team at App Developer UK specialises in creating bespoke mobile solutions that deliver results. Contact us today to discuss your project.